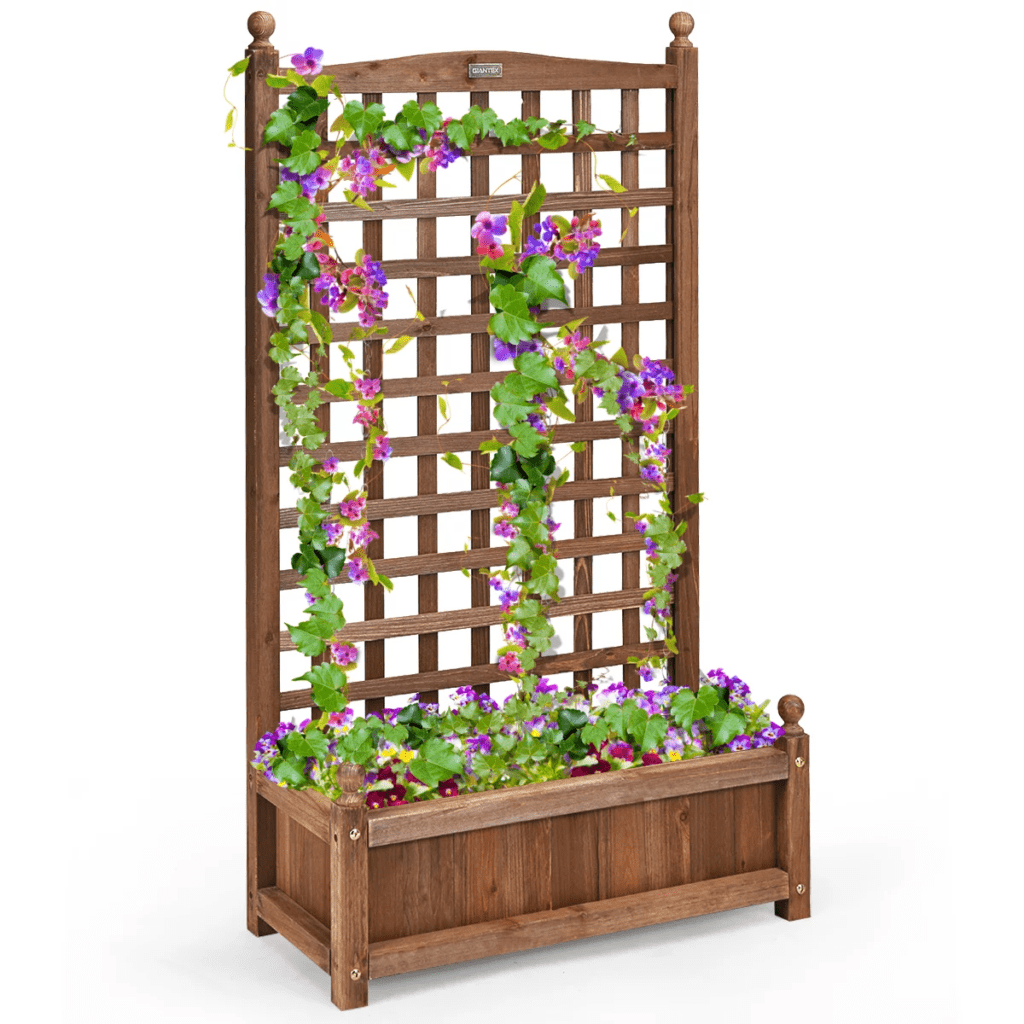
Sturdy Flower Box and Trellis Essential Materials
Over the years, I’ve constructed A LOT of Flower Box and Trellis using fence pickets (like these deck railing planters and this trellis). Fortunately, I had just enough leftover cedar from prior outdoor projects to create this DIY planter with trellis!
By the way, don’t forget to look at our other article “Flower Box Ideas”!
- 4 cedar fence pickets
- 2 2×2 cedar boards
- 1 1×4 cedar board (or use another fence picket)
- Pocket hole jig
- You can also countersink screw holes and join them together with 3″ outdoor screws.
- Learn more about how to use a Kreg Jig and which one is right for you.
- 2 ½” exterior pocket hole screws
- Brad nail gun and 1 ¼” brad nails
- You can also use a hammer and nails if you don’t have a nail gun handy!
- Waterproof wood glue
- Table saw or circular saw
- Use a circular saw jig to get straight cuts every time!
- Sander and sandpaper
- Clamps
- Square
- Drill
- Exterior wood stain
How To Make Sturdy Flower Box and Trellis
1. THE WOODWORKING PLANS CAN BE DOWNLOADED
Remember to first download the woodworking plans! To make constructing simpler, they include a cut list, 3D models, and step-by-step instructions.
2. MAKE THE FRAME
I decided to make the frame large enough to accommodate a 2 or 3 gallon plant container, so I can change them out as the seasons change (or as they die due to neglect…) Change the dimensions to suit your requirements!
Cut the 2×2 pieces according to the diagram. Then, at both ends of the short pieces, drill pocket holes.
Apply wood glue to the ends of the short pieces and screw them into the planter box’s legs with 2 12″ screws “Screws for exterior pocket holes You can also predrill countersink holes in the legs and secure them with three screws “Instead, use exterior wood screws.
a. I began with the two shorter legs, then added the two cross braces.
b. I then did the same thing with the longer back legs. Check that the height of the cross piece is consistent across all legs.
If you have extra 2x2s, you can repeat the process around the top edge
3. SAND AND CUT THE SLATS
If you’ve been reading this blog for a while, you may have noticed that the slat pattern on this planter box corresponds to a few other outdoor projects I’ve made over the years. It’s almost become my “signature look!” for sturdy flower box and trellis.
It all started when I fenced in the area beneath our deck stairs and installed a hidden panel to access the storage underneath. The pattern was then repeated on the back of the potting bench and the bottom of the vertical planter wall.
This pattern complements the fence pickets nicely and helps to tie the entire yard together with a consistent look for your sturdy flower box and trellis.
Begin by cutting each piece to the lengths specified on the cut list. Shorter pieces are easier to work with on a table saw, in my opinion.
The rough edges on these scrap pieces were already cut off, but you can do the same thing with a table saw or a circular saw. Trim 14″ off each edge to make the 5″ wide slats, or rip them down to 2″ or 1″ slats per the plans. I like to use the Grr-ripper as a push stick to keep the board flat and tight against the fence while also protecting my hand from the blade.
Typically, the surface of these fence pickets is extremely rough. They have a lot of texture even after a thorough sanding with 150 grit sandpaper. To save time, I ran my slats through the jointer and planer to clean them up and flatten them.
4. JOIN THE SLATS TO THE FRAME
This is where the entire planter for sturdy flower box and trellis comes together! Begin with the two sides, which will have slats that are exactly the same length as the width of the frame. When I noticed that the legs were slightly bowing in, I switched one of my clamps to the spreading configuration to keep them apart.
Exterior wood glue should be applied to the back of the top slat where it meets the legs. Then, making sure it’s square, lay it across the top and clamp it into place. Then, using 1 14 inch screws, secure it to the legs “nails, as well as a brad or pin nailer
As a spacer between the slats, I used a scrap of 14″ plywood. Instead of measuring each one individually, this makes assembly so much faster! Simply butt the plywood spacer up to the first slat’s edge, then position the next one on the opposite side. Remove the spacer after gluing and nailing the slat into place! Continue down the for flower box and trellis sides until you reach the bottom of the frame. To conceal it, the bottom edge of the last slat should extend slightly below the 2×2 frame.
The front and back slats should overlap and match the top and bottom edges of the side slats. I made these pieces a little longer so I could measure them and cut them to fit.
Rep the gluing and nailing of the planter box slats on the front and back. When you’re finished, the pattern should flow around the flower box and trellis corners smoothly!
5. INSERT THE PLANTER BOX’S BOTTOM
The frame for the flower box and trellis also acts as a support for the planter box’s bottom. I had nearly a full 1×4 board left over from my planter wall project, which will be stronger than the fence picket I had planned for the bottom. It’s amazing what you’ll discover if you rummage through your lumber rack!
Measure the inside width of the planter box and cut the boards to fit. I used 1 14″ exterior wood screws to secure mine, but if they fit snugly, you probably don’t need to.
6. CONNECTION THE TRELLIS TO THE PLANTER BOX
This planter box will be placed on our front steps, where plants droop forward to catch the sun’s rays. I wanted to add the trellis to the back so that I could tie them upright and keep them looking tidy. If you do not want the trellis, simply cut all four legs to the same length.
Attach the 2″ and 1″ slats in the same manner as the planter box sides, using a 34″ wide board as a spacer.
affixing trellis slats to the planter box
The Kreg Multi-Mark tool made it simple to maintain consistent spacing on both sides of the trellis. Simply lock in the correct measurement and double-check both ends before nailing the slat in place.
7. EXTERIOR STAIN OR PAINT APPLY
While I like how unfinished cedar looks, if not treated, it will turn gray and develop dark spots over time. I dug up some old deck stain in a natural cedar color to protect my new planter box from the elements.
Work the stain in between the slats and on all surfaces with a foam brush. This stain appears darker at first but lightens as it absorbs into the wood.
8. COMPLETE YOUR NEW PLANTER BOX WITH SOME PLANTS!
I can’t wait to go shopping at my local garden center and pick out some new flowers for my planter box! But for the time being, it looks great empty!